
Long story short: In short, servicing your bike at home can be simple. With the right approach and a few basic tools, you can keep your bike in great shape. This guide shares expert tips on easy maintenance tasks you can do yourself, like checking tyre pressure and cleaning the chain.
Have you noticed that your owner’s manual has a section with minor maintenance tips? These tips help manufacturers lower service costs and give you the know-how for basic repairs. Curious about the reasons behind this?
Taking care of your motorcycle helps it run well and stay safe for a long time. In India, regular maintenance matters even more because of the changing weather and road conditions.
This article shares simple and important bike maintenance tips you can handle at home, using your owner’s manual as a guide for Indian riders. If you want to learn about what a full professional motorcycle service includes, we cover that in detail too. Let’s keep your bike in top shape!
Key Takeaways
- Taking care of your bike at home is both practical and empowering. With some basic tools and good advice, Indian riders can handle important tasks themselves, save money, and get to know their bikes better. Regular maintenance also keeps your motorcycle safe and reliable.
- Proactive maintenance, such as checking brakes, tyres, oil, and the chain, helps you spot problems early, avoid accidents, and make your motorcycle last longer—especially with India’s changing weather and roads. Doing these tasks yourself also benefits both riders and manufacturers.
- Owner’s manuals often point out that DIY maintenance can reduce service costs and help riders learn more, which supports India’s biking community. To keep these benefits, always use the right tools and work safely.
- Having the right tools and working safely is key for home tasks like checking brakes, cleaning the chain, and topping up oil. For electrical repairs, complex engine work, or anything that might affect your warranty, it’s better to let professionals handle it. Always check your owner’s manual and know your limits. Maintenance needs can also change based on your bike type.
- Maintenance costs and needs vary for scooters, mopeds, electric bikes, and high-performance motorcycles. Knowing what your bike needs helps you care for it better and save money. Check your owner’s manual to be sure your maintenance matches your bike.
Why Home Bike Maintenance Matters
The Indian motorcycle market is experiencing significant shifts, with a growing focus on entry-level bikes for new riders. Despite global sales declines for some brands, the market for small-displacement bikes is gaining traction.
Doing basic maintenance at home saves you money and helps you understand your bike better. This knowledge helps you prevent small problems like loose bolts, worn brake pads, and low tyre pressure, and it also helps your bike last longer and stay safe.
When you maintain your motorcycle, you take charge of its care and feel more confident. Doing maintenance yourself helps you connect with your bike. Always follow the owner’s manual, be careful, and avoid taking unnecessary risks.
The Importance Of Regular Bike Maintenance
Regular maintenance is essential for ensuring your safety on the road. Checking components such as brakes, tyres, lights, and steering can help detect potential issues before they become serious, supporting a safe riding experience.
If you skip regular checks, you could face accidents or expensive repairs. That’s why ongoing maintenance is so important for your safety and your bike’s long life. Staying proactive helps you catch problems early before they get worse.
Benefits Of Having Minor Bike Maintenance Tips In The Owner Manual
1. Cultural Factors
In India, biking is about more than just getting around—it’s also about personal renewal and freedom. This outlook encourages people to take an active role in caring for their motorcycles.
1.1 Community And Knowledge Sharing
Biking in India is also about being part of a community. Riders often share tips and advice on maintenance and repairs, so manufacturers add DIY tips in manuals to support this culture.
1.2 Self-reliance And Skill Development
Self-reliance is important in Indian culture, even when it comes to looking after vehicles. Adding DIY tips in manuals fits this hands-on approach to maintenance.
2. Economic Factors
2.1 Cost Sensitivity And Savings
Because the Indian market is price-sensitive, people look for ways to save on maintenance. Manuals with DIY tips help owners handle basic tasks themselves and save money.
2.2 Limited Access To Professional Services
In many areas of India, especially in rural places, it’s hard to find service centres. That’s why bike owners often need to do basic maintenance on their own.
2.3 Market Competition And Value Addition
Because the automotive market in India is so competitive, brands try to offer more value. Adding DIY maintenance tips helps keep customers happy and loyal.
3. Industry-specific Factors
3.1 Manufacturer Benefits
When manufacturers include DIY maintenance tips in manuals, it helps them in several ways. It lowers service costs, makes customers happier by letting them fix small problems, and helps the brand stand out in a crowded market.
Cost Reduction And Efficiency
When consumers fix minor issues, manufacturers see fewer service visits, reducing operational and warranty costs.
Customer Satisfaction And Loyalty
DIY tips help customers by giving them the knowledge and tools to look after their bikes. This can also make them more loyal to the brand.
Market Differentiation
Detailed DIY maintenance tips help a brand stand out and show that it cares about its customers.
Enhanced Product Perception
DIY tips can make a motorcycle feel easier to use and more affordable, adding to its overall value.
3.2 Consumer Benefits
DIY maintenance tips in manuals give consumers big advantages. They help you save money, make things more convenient, help you understand your motorcycle better, and let you enjoy working on your bike yourself.
Doing your own maintenance saves you money because you don’t need to pay for professional help with small repairs. Handling these tasks also helps you become more financially responsible.
Convenience And Independence
You can do maintenance whenever and wherever it works for you, without needing to schedule a visit to a service centre.
Increased Engagement
DIY tips help owners get more involved with their bikes, which can help you feel more connected to the brand and enjoy your bike even more.
Motorcycle Maintenance Interval Summary
Here’s a quick-reference summary of the maintenance intervals covered in this guide, pulled together in one place so you can check your bike’s whole schedule at a glance.
| Task | Interval | Signs it’s overdue |
|---|---|---|
| Engine oil change | Every 3,000-5,000 km (India’s hot climate) | Dark, gritty oil; rough engine noise; reduced mileage |
| Chain cleaning & lubrication | Every 500-1,000 km, more often in wet/dusty conditions | Visible rust, dry links, chain noise or slack |
| Tyre pressure check | Weekly, and always before long trips or extra load | Uneven tread wear, sluggish handling, poor mileage |
| Brake pad inspection | Every 1,000 km; replace every 10,000-15,000 km | Squealing, reduced stopping power, pad at wear indicator |
| Air filter clean/replace | Clean every 3,000-5,000 km; replace every 12,000-15,000 km | Reduced fuel efficiency, loss of power, black exhaust smoke, hard starting |
| Spark plug replacement | Every 10,000-15,000 km | Rough idling, misfiring, hard starting, engine surging |
| Battery check/replacement | Check terminals regularly; replace after 3-4 years or if weak | Slow cranking, corroded terminals, difficulty starting |
| Clutch cable free play | Check per owner’s manual; adjust as needed | Free play outside 2-3 mm range, clutch slip or drag |
What Are The Essential Tools For Home Bike Maintenance/service?
Before you start any bike maintenance, it’s important to have the right tools at home. Here’s what you’ll need and roughly what it costs:
| Tool | Approx. Cost (Rs) | Used for |
|---|---|---|
| Comprehensive toolkit | Often bundled free with the motorcycle | General maintenance, basic repairs |
| Wrench/spanner set (incl. torque wrench) | 100-300 (spanners); 500-1,500 (torque wrench) | Bolt tightening, precision torque work |
| Screwdriver set | 100-300 | Panels, fasteners, electrical covers |
| Pliers | 100-250 | Cable work, puncture repair, general grip tasks |
| Allen key set | 100-300 | Hex-head bolts on levers, panels, discs |
| Oil filter wrench | 150-400 | Removing oil filters during oil changes |
| Funnel | 50-150 | Mess-free oil top-ups and changes |
| Rags or microfiber cloth | 50-150 | Cleaning, wiping down parts |
| Lubricating oil and grease | 50-150 (chain lube); 200-400/L (engine oil) | Chain maintenance, general lubrication |
| Tyre pressure gauge | 150-400 | Checking and adjusting tyre pressure |
| Battery tester | 300-800 | Checking battery health and charge |
| Multimeter | 300-800 | Diagnosing electrical issues |
Good quality tools work better and help you feel more confident when taking care of your bike.
List Of Home Bike Maintenance/service Tasks
Keeping the right engine oil level protects your engine from wearing out too quickly. Here’s how to check your oil level:
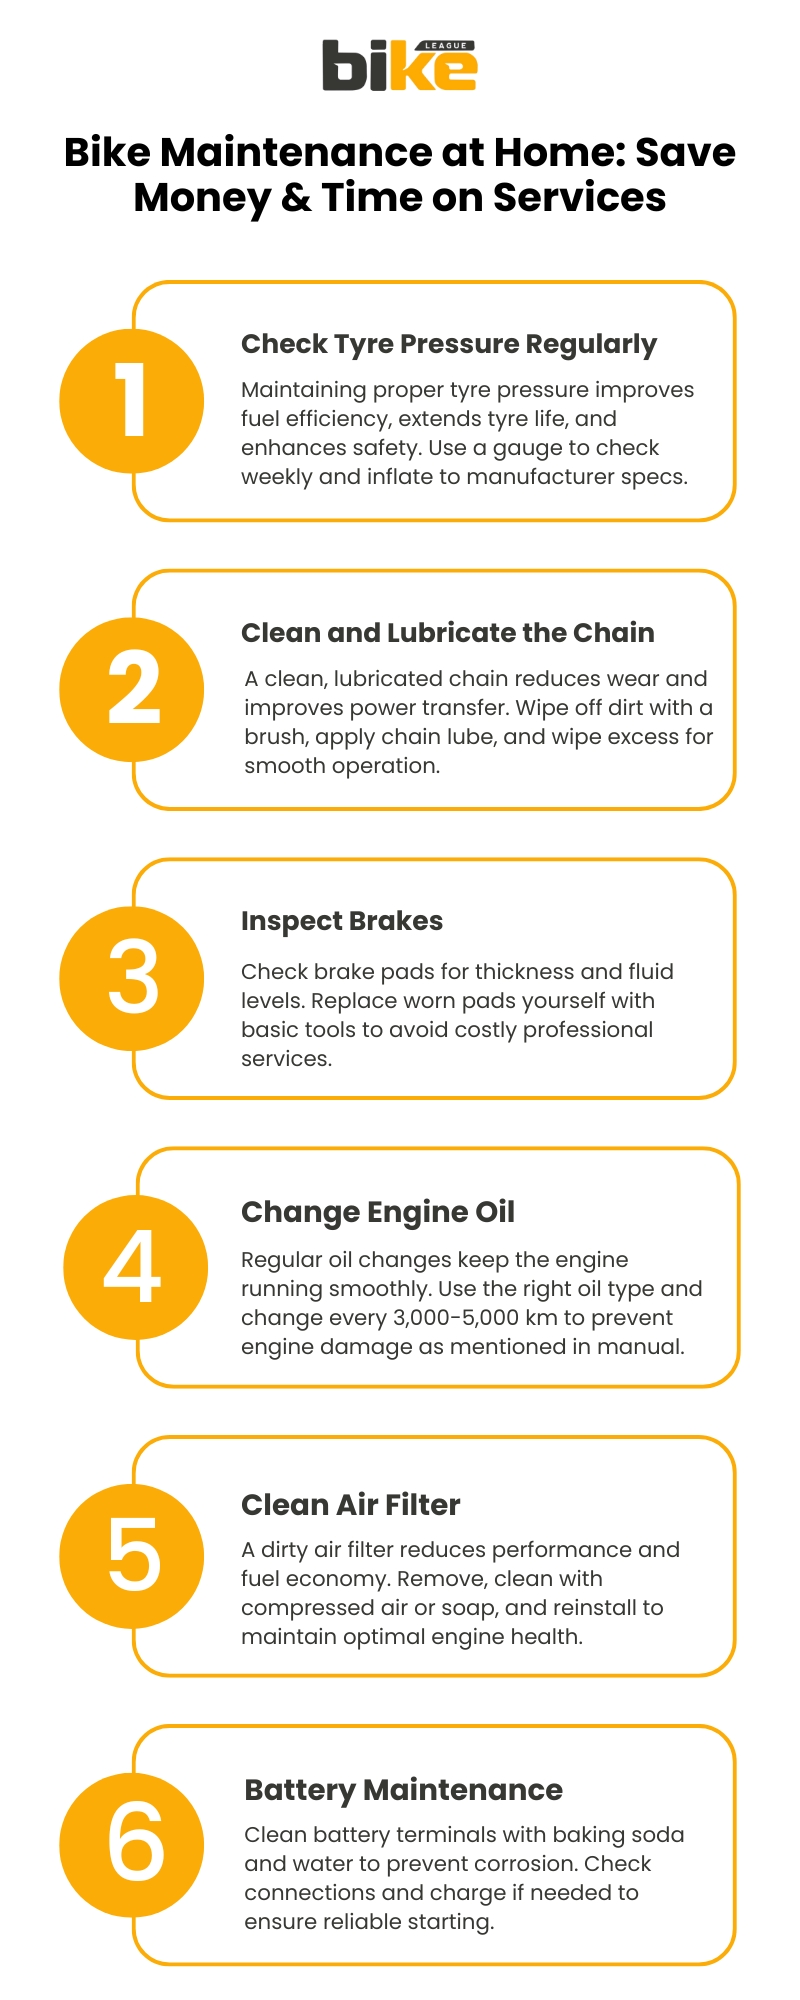
1. Engine Oil Level Checking
- Ensure the bike is on the centre stand.
- Switch on the engine and gently raise the RPM (Half throttle) for 10 seconds.
- Leave the bike in idling condition for 15 seconds.
- Switch OFF the engine & wait for the oil to settle down (Approximately 1 to 2 minutes).
- The engine oil level should be at the maximum level.
- If the oil level is not in the abovementioned condition, top up the oil to the “MAX” condition and repeat the procedure.
- Do not overfill, which may affect the clutch function.
2. Engine Oil Changes
Changing your oil regularly keeps your engine running well and helps it last longer. Here’s how to change the oil:
- Warm up the engine for a few minutes to ensure the oil drains easily.
- Place a drain pan under the oil drain plug.
- Remove the oil filler cap and drain plug, allowing the oil to drain completely.
- Replace the drain plug with a new washer if necessary.
- Fill the engine with the recommended amount and type of oil.
- Replace the oil filler cap and run the engine for a minute.
- Check for leaks and ensure the oil level is correct using the dipstick.
- Dispose of the used oil properly at a recycling centre.
In India’s hot climate, change your oil more often—typically every 3,000–5,000 kilometres, based on riding conditions and oil type.
3. Chain Maintenance
Taking care of your bike’s chain helps it run smoothly and last longer. Here’s what to do:
- Clean the chain regularly with a specialised chain cleaner.
- Use a brush to remove dirt and grime from the chain links.
- After cleaning, allow the chain to dry completely.
- Apply a high-quality chain lubricant specifically designed for motorcycles.
- Adjust the chain tension according to your motorcycle’s specifications.
- Inspect the chain for wear and replace it when necessary.
Due to India’s climate, clean and lubricate your chain every 500–1,000 kilometres, or more often in wet or dusty conditions. For a deeper walkthrough with tools and technique, see our motorcycle chain cleaning and maintenance guide.
4. Tyre Maintenance
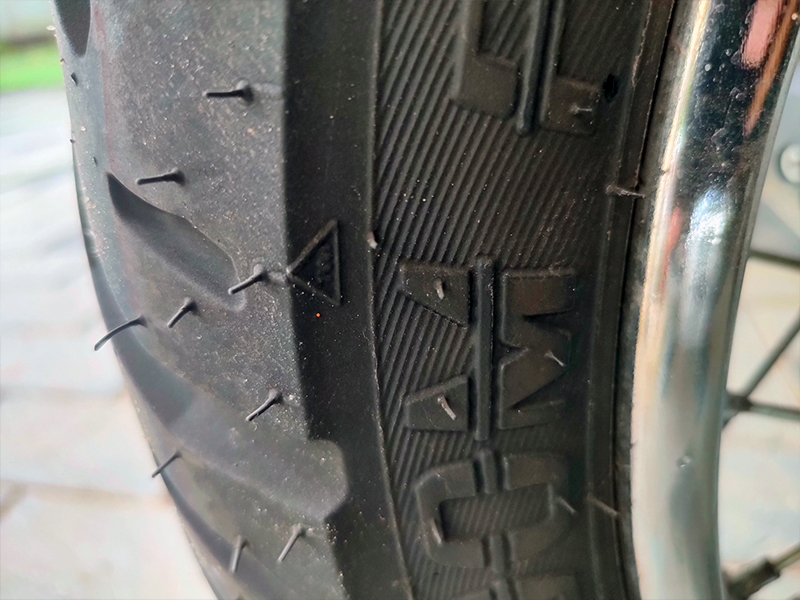
Taking care of your tyres is important for your safety and for getting the best performance from your bike.
Here’s what you should do:
- Check tyre pressure when the tyres are cold (before riding).
- Inspect tyres for any signs of wear, cuts, or embedded objects.
- Adjust pressure according to load and riding conditions.
- Use a reliable tyre pressure gauge for accurate measurements.
Since roads in India can be rough, check your tyre pressure often, especially before long trips or when carrying extra weight. Picking the right tyres is important too. For more help, see our two-wheeler tyres guide and best bike tyre brands in India.
5. Brake Inspection
Keeping your brakes in good shape is key for safety. Here’s what to check:
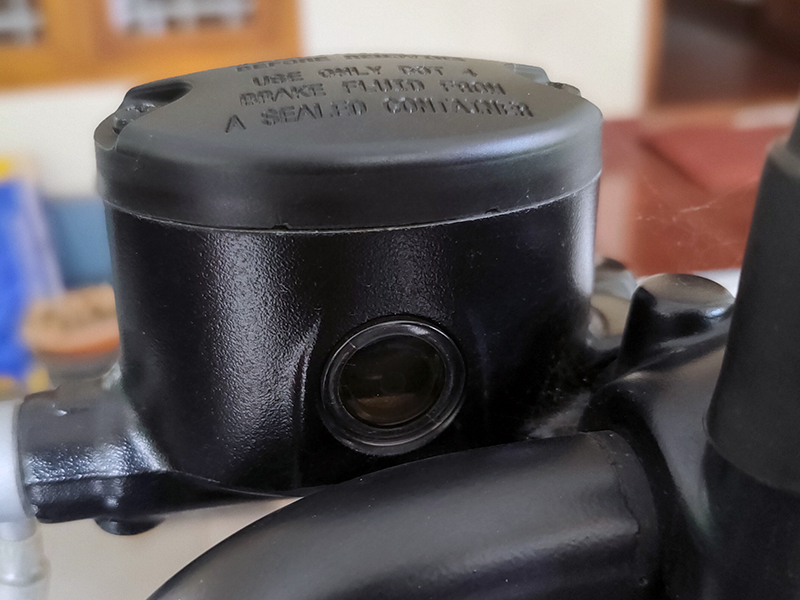
- The front and rear brake pads must be checked for wear at the intervals specified in the periodic maintenance chart.
- The pads must be replaced if a brake pad is worn to the indicator.
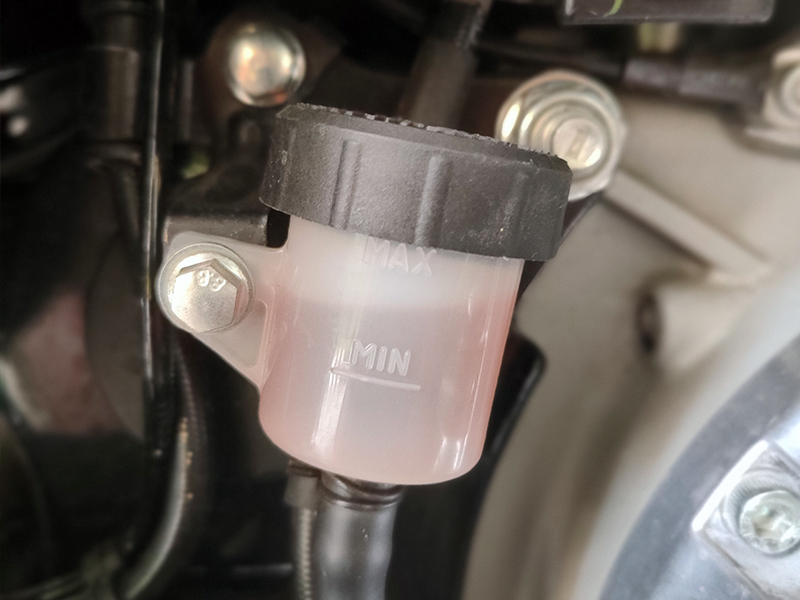
- Check brake fluid levels and top up if necessary.
- Look for any signs of brake fluid leaks.
Check your brake pads every 1,000 kilometres. Depending on how you ride, you might need to replace them every 10,000 to 15,000 kilometres.
6. Air Filter Maintenance
A clean air filter helps your engine work its best. Here’s how to take care of it:
- Locate and remove the air filter.
- Pull out the filter element and check for dirt. Clean the filter element carefully.
- Clean carefully for dust and oil particles inside the air filter box.
- High-pressure compressed air is not recommended for cleaning air filter elements.
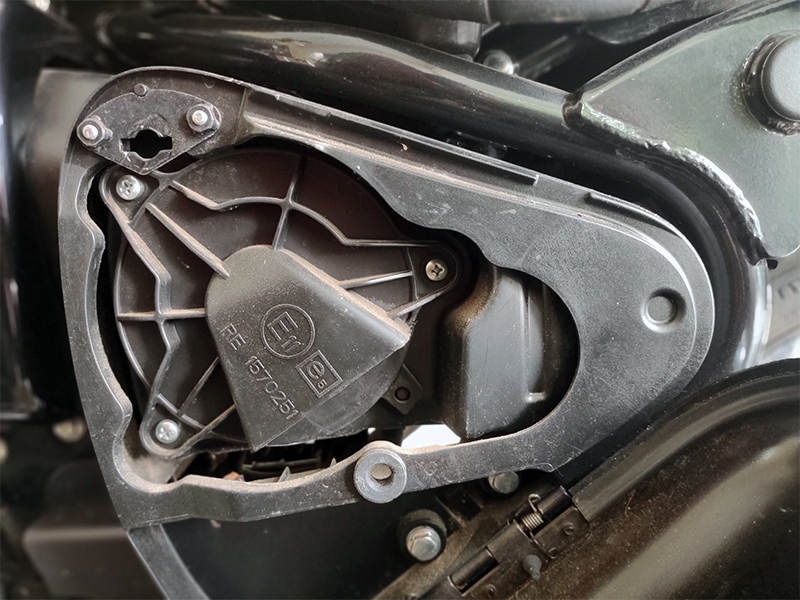
Since it’s often dusty in India, check and clean your air filter every 3,000-5,000 kilometres, and replace it every 12,000-15,000 kilometres, or sooner if you notice reduced power or fuel efficiency.
7. Battery Maintenance
The steps below are for conventional lead-acid/VRLA batteries on petrol motorcycles and scooters. If you ride an electric bike, skip to the Electric Bikes section, which covers lithium-ion battery care separately.
Taking care of your battery helps avoid starting problems. Here’s what to do:
- Check battery terminals for corrosion.
- Clean the wire terminals free from corrosion and keep the terminals coated with petroleum jelly.
- When removing the battery connections, always disconnect the black negative (-ve) battery cable first and then the red positive (+ve) cable.
- Always connect the red (+ve) positive terminal only after connecting the black (-ve) negative terminal.
- Keep the red (+ve) positive and (-ve) negative terminal cables connected to the respective battery terminals. Failure to do so may damage the motorcycle’s electrical system.
- Ensure the battery is charged correctly.
- Replace the battery if it shows weakness or is over 3-4 years old.
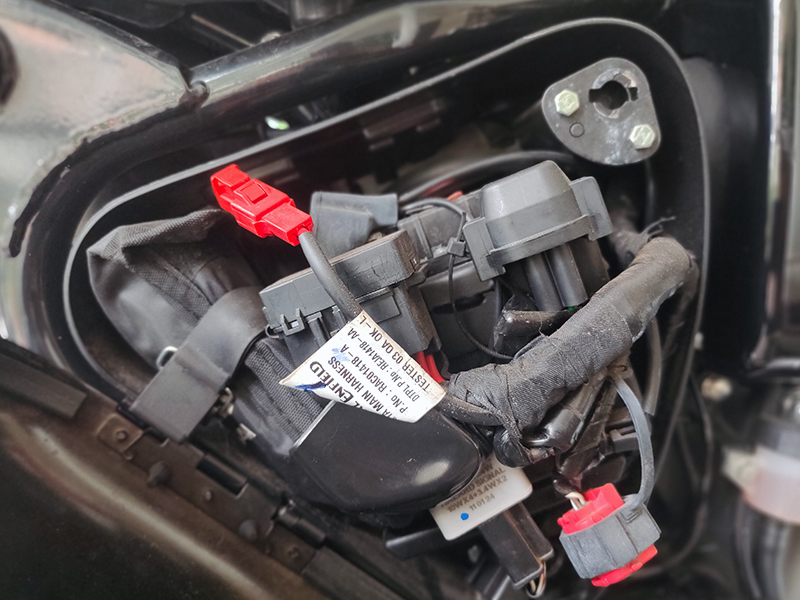
Because of India’s hot weather, check your battery fluid levels more often. Also, make sure the battery terminals are tight to avoid electrical issues.
8. Spark Plug Maintenance
A worn-out spark plug can cause engine misfiring and other problems. Follow these steps to avoid these annoying issues:
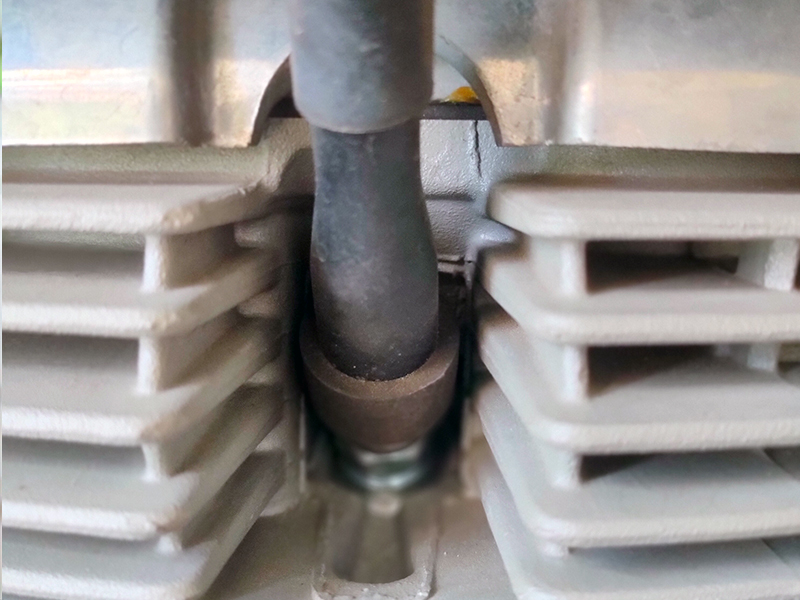
- Disconnect the spark plug caps from the spark plugs.
- Locate the spark plug spanner on the spark plug, loosen it, and remove it from the cylinder head.
- Check the spark plug for carbon deposits and centre electrodes for uneven wear.
- Clean the insulator tip and electrodes of the plug carefully.
- Check and set the electrode gap per the owner’s manual.
- Always replace spark plugs only as per recommended specifications.
- Refit the spark plug on the cylinder head as per the tightening torque specification & refit the spark plug cap on the spark plug.
For a full breakdown of spark plug types, heat ranges, and lifespan, see our motorcycle spark plug guide.
9. Clutch Cable Free Play Inspection/ Adjustment
The amount of free play in your clutch cable affects how long your clutch lasts. Adjust it whenever needed to keep your bike performing well.
- Free play should be measured at the clutch lever’s ball end per the owner’s manual.
- The clutch lever is to be actuated 3 times before any measurement.
- Locate the clutch cable adjuster near the clutch lever on the handlebar.
- Check the free play in the clutch lever (usually 2-3 mm).
- If adjustment is needed, loosen the locknut on the adjuster.
- Turn the adjuster to increase or decrease cable tension.
- Tighten the locknut once the correct free play is achieved.
- If the handlebar adjuster doesn’t adjust enough, locate the secondary adjuster near the engine.
- Repeat the process with the secondary adjuster if necessary.
- Test the clutch operation to ensure smooth engagement and disengagement.
Maintenance Considerations Specific To India
When you take care of your motorcycle in India, keep these points in mind:
- Climate: India’s diverse climate requires frequent maintenance checks, from scorching summers to monsoon rains. Pay extra attention to cooling systems and perform more frequent oil changes in hot weather.
- Road Conditions: Variable road quality in India necessitates regular checks of suspension systems and tyres. Be prepared for unexpected wear and tear due to rough roads.
- Availability: In some regions, obtaining genuine spare parts can be challenging. Stock up on essential parts and quality oil when available, especially if you live in remote areas or plan long rides.
- PUC compliance: Keep your Pollution Under Control (PUC) certificate up to date. It’s required by the Motor Vehicles Act. Well-maintained air filters, spark plugs, and proper carburettor or fuel-injection tuning help your bike pass the emissions test.
What Are The Safety Precautions And Best Practices?
Whenever you work on your bike at home, always put safety first:
1. Maintain A Safe Work Environment
- Ensure your workspace is well-lit and ventilated to prevent accidents and exposure to harmful fumes.
- Do not perform maintenance work under direct sunlight.
- Keep your work area clean and organised to locate tools and parts quickly.
- Have a first aid kit readily available to handle minor injuries that might occur during maintenance.
2. Use The Right Tools For The Job
- Equip yourself with essential tools such as socket wrench sets, wrenches, screwdrivers, spanners, hex bit sockets/Allen wrenches, impact wrench/driver, hammer, pressure gauge, pliers, torque wrench, oil filter wrench, chain breaker, rivet tool, and a multimeter.
- Ensure all tools are in good condition and adequately maintained to prevent accidents or damage to your motorcycle.
- Use specialised tools like chain breakers and tyre irons for specific maintenance tasks.
3. Follow Safe Tool Usage Practices
- Ensure sockets are correctly seated on bolts to avoid slipping and potential injury.
- Use the correct size wrench to prevent rounding off bolt heads.
- Apply the correct amount of pressure when using screwdrivers to avoid stripping screw heads.
- Use gentle taps when using a hammer to avoid damaging parts.
- Regularly calibrate your torque wrench to maintain accuracy.
4. Refer To The Owner’s Manual
Look at your bike owner’s manual before starting any maintenance at home. It gives you step-by-step instructions, shows where parts are, and lists the correct torque settings for bolts and nuts.
When To Seek Professional Help
You can do many bike maintenance tasks at home, but sometimes you’ll need help from a professional:
- Complex mechanical issues like engine malfunctions or transmission problems.
- Major suspension repairs.
- Complete brake system overhauls.
- Significant electrical troubleshooting.
- When you lack the necessary tools or expertise for a specific task.
Having your bike checked by a professional once or twice a year can help catch problems you might not notice at home.
What Are The Emergency Roadside Repairs, Or What Essential Items Should Be Included In A Diy Emergency Kit For Bike Service At Home?
For emergency roadside repairs, focus on fixing punctures, carrying basic tools, and using quick fixes that work well on India’s rough roads.
1. What To Include In Your Diy Emergency Kit?
Pack these small, affordable items. You can find them on Amazon India or at local shops for ₹500-2000:
- Puncture kit (with a tool to clean holes, rubber strips for tubeless tyres, a patch or spare tube and simple levers for tube tyres)
- Mini pump or a CO2 inflator with a pressure gauge
- Multi-tool that includes metric Allen keys, 8-14mm spanners, a screwdriver, and a chain tool
- Zip ties, duct tape or electrical tape, and spare fuses or bulbs
- Adjustable wrench, spark plug wrench, rag, torch, gloves
- Basic first aid items like band-aids and antiseptics, plus some cash for mechanics
2. How To Repair A Puncture?
- For tubeless tyres: Pull out the object with pliers, clean the hole, insert a rubber plug, trim any excess plug, inflate the tyre, check for leaks with soapy water, then ride slowly to a repair shop.
- For tube tyres: let out the air, remove the wheel and tyre, clean the hole, add glue, and stick on the patch. Put everything back together and refill the air, or swap in a spare tube. Avoid fixing the tyre’s sides yourself; go to a repair shop as soon as you can after a temporary fix.
3. Other Quick Roadside Fixes
- Loose bolts or parts: Tighten with wrenches or spanners, or hold in place with zip ties or tape.
- For chain problems: use a chain tool or quick link to fix it. If the chain is dusty, apply some oil.
- For electrical issues: replace fuses, wrap wires with tape, or check the battery. If you have brake or clutch problems, tighten them with a multi-tool. It’s also a good idea to carry extra levers in case one breaks during a fall.
4. Tips For Servicing Your Bike At Home
Clean and oil your chain, check tyre pressure every week, and tighten brakes or gears with basic tools. For bigger repairs, you can use apps like Apna Mechanic or BikePromech to call a mechanic to your home. Regular checks help prevent most breakdowns.
What Diy Maintenance Could Affect Your Motorcycle Warranty In India, And Which Tasks Should You Leave To Authorised Service Centres To Keep Your Warranty Valid?
Most DIY maintenance will not automatically void your warranty under the Indian Consumer Protection Act 2019. However, each manufacturer has its own rules about authorised service and which tasks affect your warranty. Some brands require all servicing to be done at authorised centres to keep warranty benefits, and they may reject claims if unapproved repairs cause damage.
The table below puts the warranty-voiding and warranty-safe tasks side by side, so you can quickly check which category a job falls into before you pick up a tool.
| Voids warranty — leave to authorised centres | Safe DIY — rarely affects warranty |
|---|---|
| Opening the engine or altering major internal components | Tyre pressure checks, inflation, tubeless puncture repairs (temporary plugs only) |
| Unauthorised electrical repairs (cutting or welding wires) | Chain cleaning, lubing with OEM-approved products, tension adjustments |
| Modifying exhaust or ECU tuning | Brake/clutch cable adjustments (no replacement or opening) |
| Using fake or cheap parts (oil, spark plugs, etc.) | Battery terminal cleaning, checking connections |
| Missing scheduled services beyond the brand’s grace period | Bolt/fastener tightening, cable inspection |
| Using wrong fuel or oil not recommended by the manufacturer | Washing (avoid high-pressure jets near electrics/air intakes) |
| Misuse: flood-prone riding, racing, or stunting | |
| Engine/transmission work by non-authorised mechanics | |
| Fitting unapproved accessories (remote alarms, musical horns, extra lights) |
Tip: Always keep your service records, use only OEM-grade parts and fluids, and check your owner’s manual before doing any work to make sure your warranty stays valid.
What Are The Diy, Mechanic/doorstep, And Service Centre Costs For Common Motorcycle Repairs And Tools In India?
Below is a table with estimated costs for common motorcycle repairs and tools in India for 2026, based on typical pricing across metro and tier-2 city mechanics and authorised service centres. It compares DIY, mechanic or doorstep, and service centre options to help you plan your budget. Actual prices vary by brand, city, and part quality — use these as planning estimates, not quotes.
| Service/Repair/Part/Tool | DIY Cost (Rs) | Mechanic/Doorstep (Rs) | Service Centre (Rs) | Savings(DIY%) |
|---|---|---|---|---|
| Puncture (tubeless/tube) | 20-100 | 100-300 | 300-500 | 70-80% |
| Regular servicing (oil, chain, check) | 200-400 | 400-600 | 500-1,000 | 50-60% |
| Oil & filter change | 300-600 | 400-950 | 500-1,200 | 40-50% |
| Chain clean/lube | 50-150 | 100-200 | 150-300 | 60% |
| Air filter replacement | 80-200 | 149-300 | 200-400 | 50-60% |
| Brake pad/shoe replacement | 200-400 | 250-500 | 500-1,500 | 50% |
| Spark plug replacement | 30-100 | 50-150 | 150-300 | 70% |
| Tyre replacement | 500-2,500 | 800-3,500 | 1,500-4,000 | 40-60% |
| Battery replacement | 1,000-2,000 | 1,500-2,500 | 2,500-4,000 | 50% |
| Engine oil (per litre) | 200-400 | 200-400 | 200-400 | 0-50% |
| Oil filter | 50-200 | 99-200 (labour) | 100-250 | 50-75% |
| Spare tube | 200-400 | 200-400 | 250-400 | 0-50% |
| Air filter element | 80-200 | 149-200 (labour) | 150-300 | 40-75% |
| Brake pads(set) | 200-400 | 250-350(labour+part) | 400-800 | 50% |
| Chain+sprocket(worn) | 1,000-2,500 | N/A | 2,500-6,000 | 60-75% |
| Puncture kit (5-pc tubeless) | 150-400 | N/A | N/A | One-time: Rs850-2,300 |
| Mini pump/CO2 inflator | 300-800 | N/A | N/A | One-time investment |
| Multi-tool (15-in-1) | 150-500 | N/A | N/A | Permanent tool |
| Spanners/Allen key set | 100-300 | N/A | N/A | Permanent tool |
How Does Caring For Scooters, Mopeds, Electric Bikes, And High-performance Motorcycles Differ In India At Home?
Each type—scooter, moped, electric bike, and high-performance motorcycle—has its own maintenance needs because of differences in engines, usage, and parts. The amount of DIY care, cost, and difficulty also varies for each on Indian roads.
The table below compares the four vehicle types side by side, so you can see at a glance how their maintenance needs differ.
| Aspect | Scooter | Moped | Electric Bike | High-Performance Motorcycle |
|---|---|---|---|---|
| Drivetrain/Transmission | CVT (rollers, belts, springs); no chain | Simple engine, basic drivetrain | No engine or transmission oil needed | Manual gearbox, often separate gear oil |
| Service interval | CVT parts checked every 12,000 km; belt replaced at 22,000-25,000 km | Every 3,000 km | Brake pads, tyre rotation, free software updates | Gear oil changed after first 500 km, then every 5,000 km |
| Chain/Belt care | No chain; clean CVT filters monthly in monsoon | Standard chain care as per general guide | Not applicable | Check every ride, lube before weekly; replace every 20,000-30,000 km (vs. 40,000 km on standard bikes) |
| Battery/Power system | Standard lead-acid/VRLA as per general guide | Wears out faster due to heavy use | Main wear part; keep charge between 20-80%, avoid heat above 35°C | Standard lead-acid/VRLA as per general guide |
| Typical DIY difficulty | Moderate — CVT unfamiliar to some local mechanics | Easy — simple engine, most tasks DIY-friendly | Easy — fewer moving parts, but no pressure washing near BMS | Harder — precision torque wrench needed, synthetic oil mandatory |
| Relative running cost | Cheapest; parts ₹300-600 | Low, but parts wear faster with heavy use | Low ongoing cost — no oil, ~70% less maintenance overall | Highest — synthetic oil, premium chains (₹4,000-6,000), coolant flush |
Faqs On How To Perform Essential Bike Maintenance/service At Home In India
1. How Should I Prepare My Motorcycle For The Monsoon Season In India?
Before the monsoon, check tyre tread depth for grip on wet roads, apply chain lubricant more often since water washes it off faster, and inspect brake pads since wet braking wears them quicker. Coat exposed metal parts with a rust-inhibiting spray and check that electrical connectors are sealed against water ingress. For a full monsoon-readiness checklist, see our monsoon bike ride guide for India.
2. How Do I Choose The Right Engine Oil For My Motorcycle In India’s Climate?
Always start with the viscosity grade (e.g., 10W-30, 20W-40) specified in your owner’s manual, since it’s matched to your engine’s tolerances. If your bike has a wet clutch — most Indian motorcycles do — pick an oil rated JASO MA/MA2, not a car-spec oil, or you risk clutch slip. Semi-synthetic or full-synthetic oils generally cope better with India’s summer heat and stop-start city riding than mineral oils. Our complete guide to bike engine oil breaks down viscosity, mineral vs synthetic, and India-specific recommendations in full.
3. What Are The Signs That My Motorcycle’s Air Filter Needs Cleaning Or Replacement In India?
Signs that your motorcycle’s air filter needs cleaning or replacement in India include:
- Reduced fuel efficiency
- Loss of engine power
- Black smoke from the exhaust
- Difficulty starting the engine
- Unusual engine sounds
- Visible dirt or debris on the air filter
- The filter has been in use for more than 12,000-15,000 kilometres
In India’s dusty conditions, it’s advisable to check and clean the air filter every 3,000-5,000 kilometres, and replace it every 12,000-15,000 kilometres, or as recommended by the manufacturer.
4. How Can I Prevent Rust On My Motorcycle During India’s Humid Climate?
To prevent rust on your motorcycle in India’s humid climate:
- Wash your bike regularly and dry it thoroughly.
- Apply a protective wax coating to the painted surfaces.
- Use a rust-inhibiting spray on exposed metal parts.
- Keep the motorcycle covered when not in use.
- Store the bike in a dry, well-ventilated area.
- Address any paint chips or scratches promptly to prevent rust from forming.
- Apply a thin layer of oil on chrome parts to protect them from moisture.
- Use silica gel packets to absorb excess moisture in storage areas.
- Regularly inspect and clean areas prone to water accumulation.
- Consider using a dehumidifier in your storage area during extremely humid seasons.
5. What Are The Signs That My Motorcycle’s Spark Plugs Need To Be Replaced?
Signs that your motorcycle’s spark plugs need replacement include:
- Difficulty starting the engine
- Rough idling or misfiring
- Decreased fuel efficiency
- Loss of engine power
- Acceleration issues
- Engine surging or hesitating
- Visible wear or damage on the spark plug electrodes
It’s generally recommended that spark plugs be replaced every 10,000 to 15,000 kilometres or as specified in your motorcycle’s manual.
Here Are Some Related Articles From Our Team
- Bike engine oil – Everything you need to know explained
- What all basic motorcycle accessories should a rider have
- Motorcycle service – All things you need to know explained
- Yamaha vs Honda vs Kawasaki : Comparing Bike Giants
- Motorcycle chain – how to clean, adjust & maintain
Conclusion
Doing regular maintenance at home isn’t just about saving money. It keeps you safe, helps your bike last longer, and makes riding more enjoyable. By following this guide and considering India’s unique conditions, you can keep your bike ready for any adventure.
Home maintenance is important, but it’s also important to know when to call a professional for repairs. With the right mix of home care and expert help, your bike will give you reliable and enjoyable rides for years.
When you take care of your motorcycle, you’re looking after more than just a machine. You’re keeping alive a symbol of freedom and independence in India’s vibrant culture. Stay safe, ride responsibly, and enjoy maintaining your bike at home!
If you have questions or need more information, email us at bikeleagueindia@gmail.com or leave a comment below. We’re always here to help. You can also follow Bikeleague India on social media to stay connected!